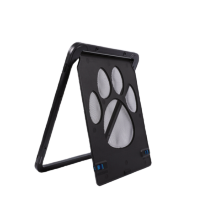
Here’s a step-by-step installation guide for your interior dog door:
Gather Your Tools: Before starting, make sure you have all the necessary tools handy. You may need a screwdriver, measuring tape, pencil, level, and a saw (if adjustments are required).
Measure and Mark: Begin by measuring the height and width of the interior door where you intend to install the dog door. Use a pencil to mark the center of the door both vertically and horizontally.
Positioning: Hold the interior frame of the dog door against the door at the desired height, aligning it with your pencil marks. Ensure that it is centered both vertically and horizontally. Use a level to make sure it is straight.
Mark Mounting Holes: With the frame in position, mark the locations of the screw holes on the door using a pencil. Typically, there will be several holes around the perimeter of the frame.
Pre-Drill Holes: Using an appropriate sized drill bit, pre-drill holes at the marked locations on the door. This will make it easier to screw in the mounting screws.
Attach the Frame: Hold the frame back in position and insert screws through the pre-drilled holes. Tighten them securely to affix the frame to the door. Make sure the frame is stable and doesn’t wobble.
Install the Flap: If your dog door has a flap, follow the manufacturer’s instructions to attach it securely to the frame. This usually involves sliding it into place and securing it with screws or clips.
Test the Door: Once everything is installed, test the door to ensure it swings freely and that your dog can comfortably pass through it. Make any necessary adjustments if the door is too tight or too loose.
Secure any Loose Ends: Check all screws and connections to ensure they are tight and secure. Trim any excess material or adjust the flap as needed.
Final Check: Give the door a final inspection to ensure everything is installed correctly and securely. Make any final adjustments if necessary.
That’s it! Your interior dog door should now be installed and ready for use. If you have any questions or encounter any difficulties during the installation process, don’t hesitate to refer to the manufacturer’s instructions or seek further assistance.


